SKY TEMPLE
(By xDaunt)
(By xDaunt)
Let the Battle Begin
Sky Temple is the sixth map released by Blizzard for Heroes of the Storm. Like Blackheart’s Bay before it, Sky Temple is more PvE-centric than the other maps in that base destruction is more often secured through map mechanics than actual team pushing. Unfortunately, Sky Temple, like Haunted Mines before it, is also one of the more unforgiving maps. A team’s early lead often snowballs out of control by the time that the mid game rolls around. Early mistakes can be fatal.
This guide will help new players understand the fundamental elements of the map and provide them with a sound strategic foundation for riding temple lasers to victory.
Getting to know the map
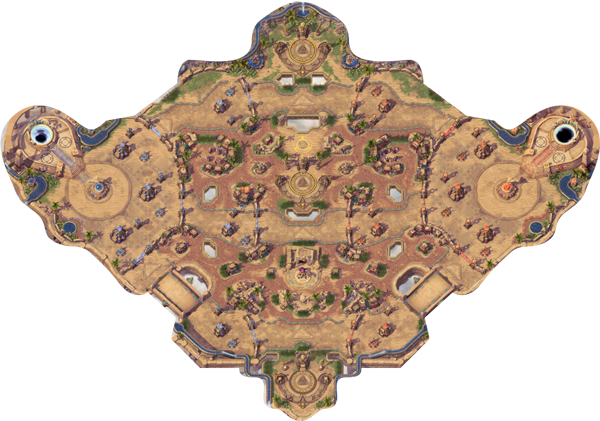
Geography
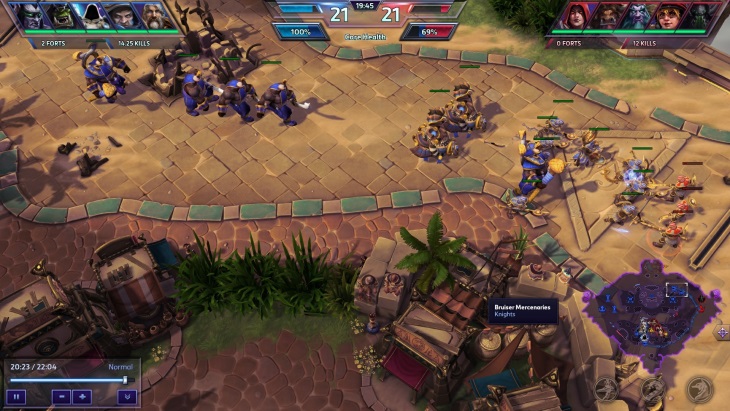
Sky Temple is a three-lane map. The bottom lane is the longest. Fairly intricate jungle areas lie between each lane. In the upper jungle lies a watchtower that controls the top half of the map. Two sets of Bruiser Mercenary camps flank the upper jungle. The Bruiser Mercs will push the top lane. The lower jungle is flanked by two sets of Siege Giant camps. A Boss Camp lies in the middle of the lower jungle. No watcher tower is available to provide vision of this area. The Siege Giants and Boss will push the bottom lane. Pay special note to where the Boss is. We will revisit this later.
The Temples
The map’s dominant features are three temples located along a north-south axis in the middle of the map, stretching from the very top of the map to the very bottom. As the game progresses, one, two, or three of these temples will activate and become capturable objectives. Capturing a temple requires merely positioning a hero within the applicable, highlighted temple area. Once a temple is captured, the temple will begin to shoot lasers at the enemy base, destroying structures. Lasers will first destroy towers, gates, and moonwells at a given fort location. After all the lesser structures are gone, the lasers will target the forts themselves and destroy them. The fort location nearest to the temples will be targeted first. For example, the top temple will shoot the top fort location first. Once completely destroyed, the temple will destroy the middle fort location, followed by the bottom fort. The bottom temple will work in reverse order. When all three forts have been destroyed, the lasers will next begin targeting the perimeter of keeps in similar fashion. When all keeps have fallen, the lasers will target the core. Capturing the temple will also trigger temple guardians to activate and attack any heroes that are trying to capture the temple. Notably, killing the guardians is unnecessary to capture a given temple. Each temple has forty-five shots. Temple damage scales upwards as the game progresses. The final five shots of the temple will fire automatically and in rapid succession for the team that currently has possession of the temple once the first forty shots have expended. This means that teams can leave the temples once the charging sequence for the final five shots begins.
For the first round of temple activations, the top and middle temples will both activate at 1:30. For the second round of temple activations, the bottom temple will activate two minutes after the first temple round was completed. Afterwards, and for the next four phases, combinations of one or two temples will activate two minutes after the previous temple phase was completed. For the seventh and eighth phases (the seventh starts at around the 21-minute mark, depending upon the game), all three temples will activate simultaneously.
Temple lasers do a lot of damage. They can very quickly burn down towers and forts. This destructive power, combined with the relatively high frequency of their activation, can lead to games quickly spiraling out of control for the losing team. In particular, heroes dying during the periods between temple phases can have disastrous consequences for their teams. Large level leads are very easy to attain compared to other maps. The leading team can further press their advantage by aggressively seizing merc camps and keeping all lanes pushed. Doing so can prevent the losing team from even contesting active temples.
Strategy Considerations and Tips
Proper team coordination is critical to success when multiple temples activate. Questions that must be answered by a team immediately are 1) which temple(s) will the team contest, and 2) if the team is going to attempt to claim multiple temples at once, which heroes will go to which temple.
For the sake of simplicity, a good general rule to follow is to send all five team members to the same temple at the outset, and then reassess what to do. If one team has a level advantage or is otherwise stronger in teamfights, then its best bet is to force a teamfight by contesting the temple where the enemy team is. Conversely, the weaker team should avoid the teamfight and seize the open temple(s). If only one temple activates, then the weaker team should avoid fighting for the temple altogether and push lanes and seize mercs instead. For example, if red team has a 9-7 level advantage over blue team when the bottom temple activates, blue team should not contest the bottom temple. Instead, blue team should aggressively push lanes and soak experience to catch up. Contesting the bottom temple will likely result in a team wipe, which would effectively end the game.
Keep in mind that only one hero is needed to capture a temple. Look for opportunities to soak experience, pick off enemy heroes, and seize other map objectives during the temple phases – especially in situations where there is no threat that the enemy team will contest temples that your team has captured.
Given the snowbally nature of Sky Temple, heroes with strong early games – and especially strong level four talents (Envenom) – should be given extra consideration during hero selection. Other valuable hero traits are high mobility for moving between temples during temple phases and the ability to zone out the enemy team. Due to that last trait, many specialists such as Hammer, Gazlowe, and Zagara have enhanced value on Sky Temple.
Another strong talent on Sky Temple is MULE. Sky Temple is fundamentally a map of PvE attrition, and MULEs can provide a sizable advantage by repairing structures that are damaged during the temple phase.
Because the first two temple phases are constant, teams should proactively plan to be well-positioned for each. No more than one hero should be sent to the bottom lane at the start of the game to soak experience. Likewise, the optimal hero to send to the bottom lane at the start of the game is the most mobile to maximize experience soaking. Teams should also be mindful of when the second temple phase will start and take the opportunity to capture the Bruiser Camps so that the Bruisers push while the bottom temple is active. Slower heroes should rotate to bottom early to make sure that they are available to timely contest the temple.
Now let’s talk about the boss. There is one critical difference that makes this boss different from the bosses on the other maps: he is located dead in the middle of the map. This central location means that it is relatively easy for a team to get to the boss once it suspects that the enemy team is trying to take the boss. Combine that with the fact that this particular boss craps out team-disrupting whirlwinds in addition to its slam/stun attack, and it becomes obvious that the boss on Sky Temple is where teams come to throw games. The Sky Temple boss is particularly hazardous to take. A good rule of thumb is to avoid taking the Boss unless your team has at least a two hero advantage over the enemy team (meaning your team has two less dead heroes than the enemy team).
In fact, given that only two minutes separate each temple phase, teams should generally be careful about picking fights – or getting their heroes picked off – between temple phases. Because the temples are so powerful, a small mistake can quickly compound into a major problem as temples give the team holding them so much extra experience. This dynamic will prove very important in the game discussed below.
Game Analysis
Instead of analyzing a pro game, let’s take a look at an amateur pick-up game to see some of the principals described above in action. The particular game that we will look at is a NA Hero League game between two five-man, premade teams composed of Rank 1 players. Blue Team was composed of Uther, Illidan, Tyrael, Tychus, and Rehgar. Red Team had Valla, ETC, Malfurion, Sgt. Hammer – and as an added bonus – Abathur.
Hello and god luck
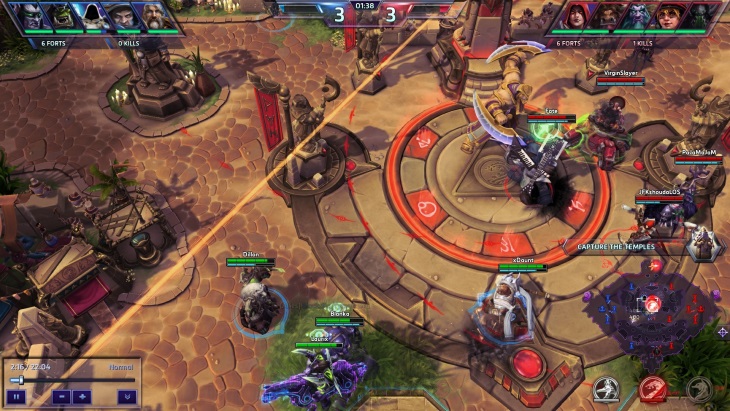
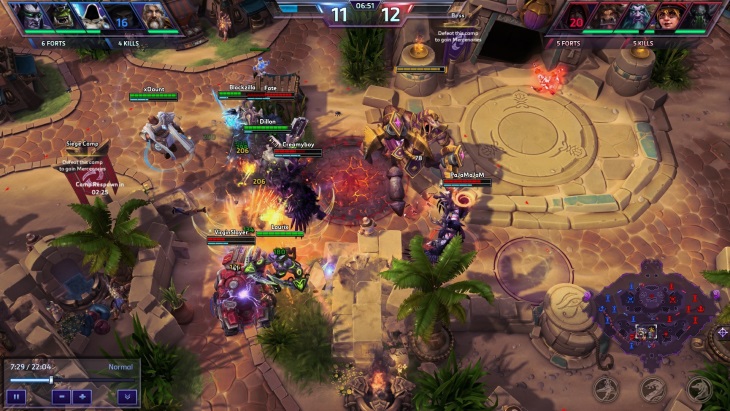
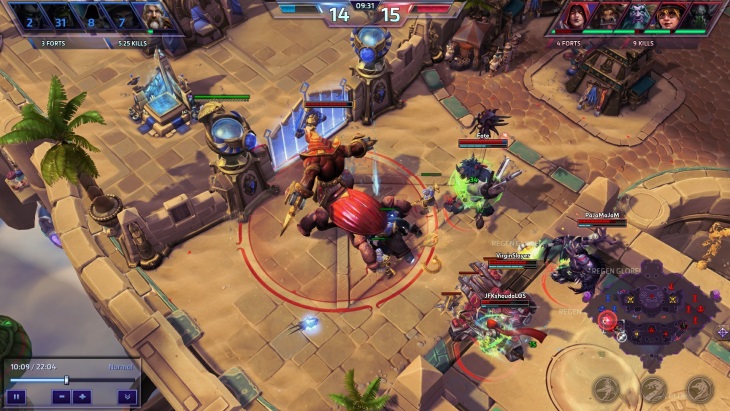
We will start our analysis at the first temple phase. As you can see, Red Team arrived at the middle temple first and sieged up around Sgt. Hammer. At level three, and without the benefit of the talents that will be available later, this was too difficult of a position for Blue Team to assault.
Note on the minimap that Abathur moved forward into the bottom lane to soak experience.
Accordingly, Blue Team wisely began to rotate towards the top temple. Tyrael took the temple, with Uther closely supporting in top lane while soaking top lane for experience. Blue Team held the top temple and was soaking top and mid lanes. In contrast, Red Team had the middle temple, and was soaking mid and bottom lanes. Because of Abathur constantly soaking bottom and because of arriving at the middle temple first, Red Team had opened a half level lead.
As the middle temple expired, Rehgar moved to take Blue-side siege giants. Red Team started to rotate top to contest the balance of the top temple’s charges. Illidan continued to soak mid, and Uther soaked top lane for Blue Team. Abathur continued soaking bottom lane for Red Team.
Leveraging symbiote, three red team members were able to successfully attack the three Blue Team defenders at the top temple and drive them out, killing Uther in the process. The result at the end of the first temple phase was a one-level lead for Red Team. Red Team’s superior lane soaking (courtesy of Abathur) and early arrival at the middle temple proved decisive in providing it with an early advantage. Simply put, Red Team’s coordination was better.
Let’s now look at how the teams handled the period intervening the first and second temple phases. Remember that both teams know that the bottom temple will be the next to activate. Red Team moved to take their Bruisers. Meanwhile, and with Tyrael soaking top, the rest of Blue Team moved bottom to push aggressively with the siege giants that Rehgar seized earlier. Note that Blue Team managed to close the experience gap a bit due to the effectiveness of this push. The timing was particularly good because Red Team was taking their Bruisers. In contrast, Red Team’s Bruisers proved to be ineffective with Tyrael holding top lane.
However, Blue Team did not have anyone soaking mid lane. Sending four players bottom was an over-commitment in this situation, which probably cost it the opportunity to completely close the experience gap before the second temple phase.
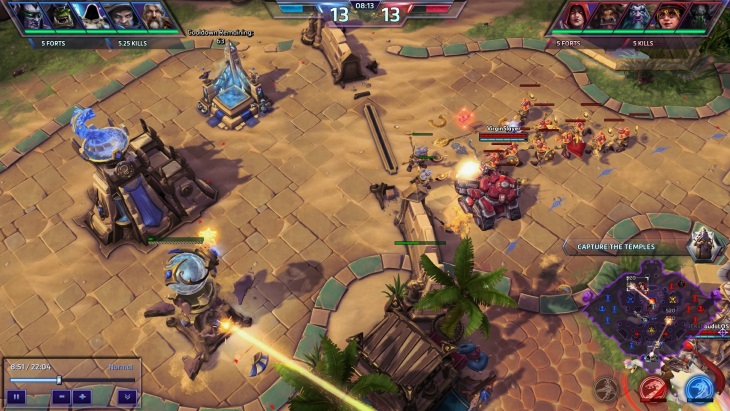
As the second temple phase approached, Illidan and Uther took Blue Team Bruisers, while Tyrael continued to soak top lane. Meanwhile, Red Team had capped its Siege Giants and already rotated its entire team bottom in preparation for the activation of the bottom temple.
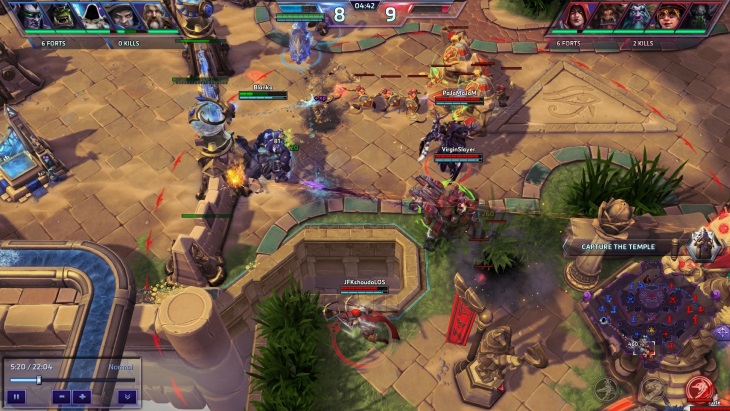
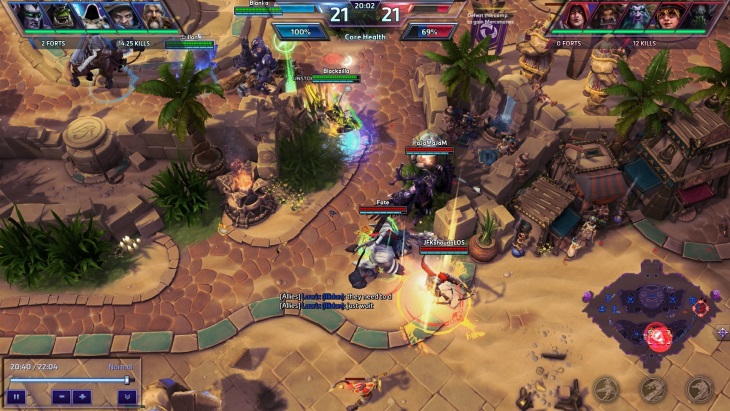
Once again, Red Team arrived at the temple first and sieged up – this time with the support of its Siege Giants pushing into the bottom fort. Illidan and Uther arrived to help Tychus and Rehgar, but Tyrael was late to the party. So Blue Team had to wait and hold.
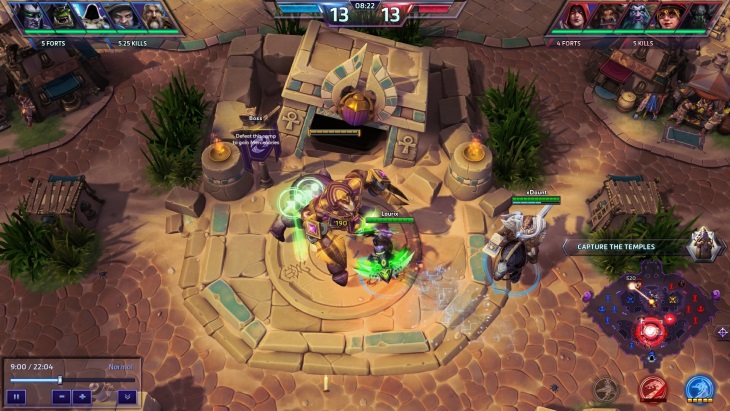
Take note of Red Team’s positioning. ETC was on the temple, and Abathur had burrowed to top lane to soak it. Meanwhile, Valla, Malfurion, and Sgt. Hammer were holding the line and sieging Blue Team’s bottom fort. This was very aggressive positioning, and Sgt. Hammer was particularly exposed.
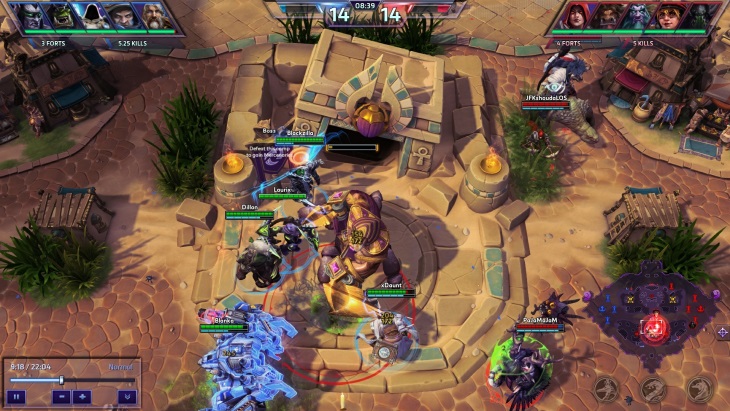
When Tyrael arrived, Blue Team pushed directly into the bottom temple. Critically, Blue Team began the attack just before Red Team hit level 10 and got access to its heroic abilities. Valla, ETC, and Hammer died. Uther and Illidan died overextending themselves chasing Malfurion.
Nonetheless, Blue Team took the temple and destroyed the bottom fort. After the first two temple phases, the game was fairly even.
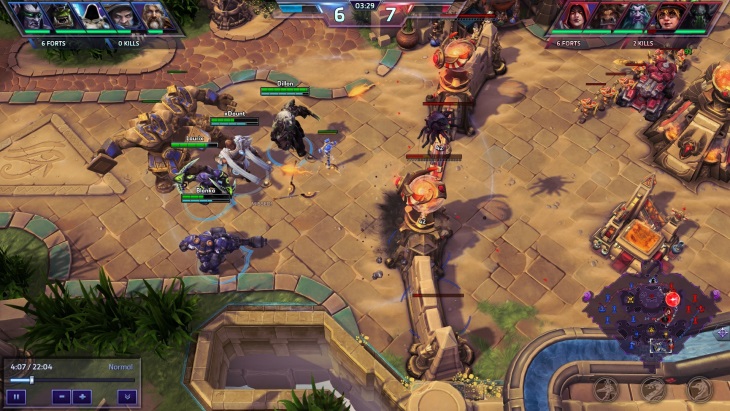
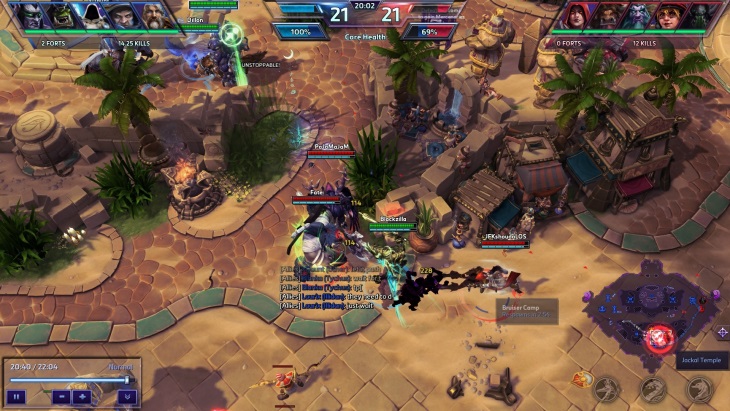
During the intervening phase, Red Team got greedy and decided to take Blue Team’s Siege Giants. Unfortunately for them, they got caught.
This time, Blue Team had the benefit of having its heroic abilities. Tychus got killed early, but Tyrael and Illidan were able to jump on Valla with judgment and hunt, respectively, erasing her.
Red Team’s positioning was particularly bad because they were pushed against the boss, which started to interfere with Red Team. It’s pretty damned hard to win teamfights when your team’s healer is stunned. Note also that Abathur cloned Malfurion instead of Valla. This probably was a misclick. The end result of this battle was Blue Team killing Valla and Sgt. Hammer in exchange for losing Tychus, thereby completely closing the experience gap.
The other upshot of winning that battle was that Blue Team was better positioned for the start of the third temple phase. Blue Team sent four players to the bottom temple, leaving Tychus to hold the middle temple. Red Team eventually collapsed on the middle temple forcing Tychus to flee, but Blue Team was still able to steal some shots from it.
After seizing the temple, most of Red Team rotated top to push the top fort. As the third temple phase ended, Blue Team stayed bottom to soak lanes. Then Blue Team came up with a brilliant idea.
That’s right. With Red Team at top lane, it was Boss time. Unfortunately for Blue Team, it did not take Red Team very long to determine what was happening.
Now look at how fast Red Team got down there from the top Blue fort, which is close to being the furthest point from the boss on the map. Within seventeen seconds.
And this was the end result. Four dead Blue Team heroes and a boss bearing down on the bottom keep. So repeat after me class: “Do not take the boss on Sky Temple unless numerous enemy heroes are dead.” Okay? Okay.
Amazingly, this was not the end of the game. Laying siege to the bottom keep Red Team pushed their advantage too hard and for too long. After resurrecting, Blue Team pushed Red Team out before Red Team was able to even take down the bottom keep, killing Valla in the process.
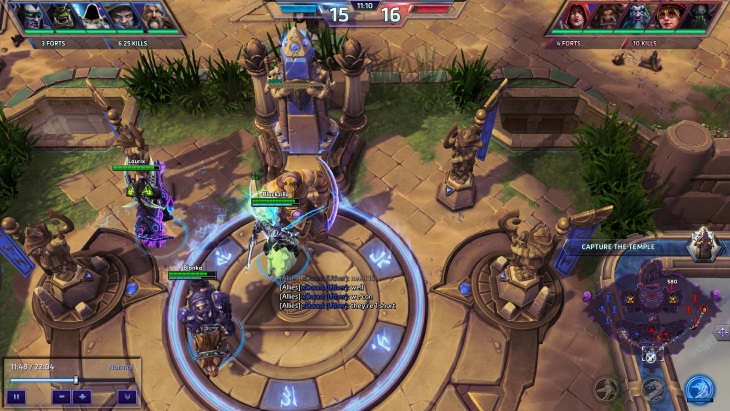
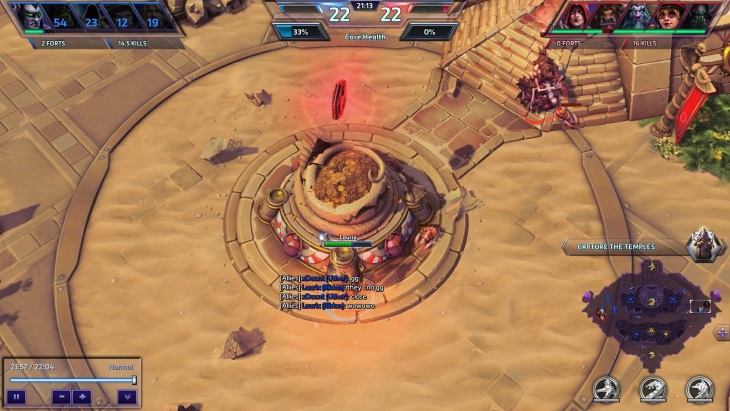
Unfortunately for Red Team, Valla’s death proved to be rather untimely, because the fourth temple phase – this time just the bottom temple – began while she was still dead. Once again, Blue Team had position to take the temple first. Note on the minimap that Valla was all the way back at her core as the temple phase began.
Blue Team’s advantageous positioning was the least of Red Team’s problems arising from Valla’s death, however. Take a look at the experience bar. Blue Team was just about to hit level 16 when the temple activated. While always an important breaking point, it was particularly important in this game. Why? Because Illidan, Tyrael, and Rehgar all took Blood for Blood. Take a guess who will be eating those?

Poor Valla.
Tyrael also died, but Blue Team held the temple, thereby making the game even once again. Keep in mind that the result could have much different had Red Team been able to contest the temple before Blue Team hit level 16. The damage that Blue Team was able to inflict upon Red Team’s structures was instrumental in getting Blue Team to level 16 in time. Red Team would have been much better served withdrawing from bottom lane sooner instead of continuing the siege on the bottom keep. It was an unnecessary risk with the temple phase so close to beginning.
After healing up, both teams headed top to seize their respective Bruiser camps. Then, they met between the camps and fought. Again, Tyrael and Illidan were able to jump on Valla and erase her nearly instantly.
In the end, Valla, Malfurion, and ETC all died for Red Team. Blue Team suffered no casualties. Blue Team’s superior late game composition was starting to take the game over.
Yet again, Red Team was caught with dead heroes as a temple phase was about to begin. Blue Team aggressively moved to push the advantage. Illidan took top temple. Meanwhile, Tyrael and Uther took middle temple and Tychus and Rehgar started to take available merc camps, beginning with Red Team’s Siege Giants. This is the point of the game where teams have the opportunity to secure runaway advantages, and Blue Team was going to make the most of it.
Eventually, Red Team regrouped and moved to contest the Middle Temple. Because Blue Team was so spread out trying to maximally leverage its early advantage, it wisely withdrew from the fight. Still, Blue Team had managed to use up almost all of the middle temple’s ammunition.
For the next two minutes, the two teams shadowed each other near the boss, but neither engaged. Then it was time for the next temple phase, and middle and top temples activated.
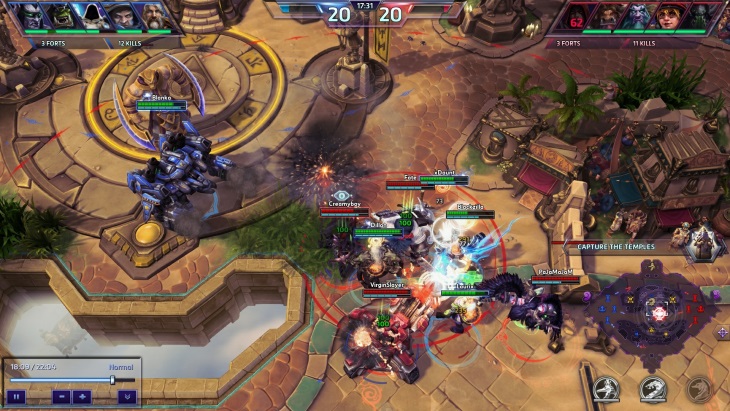
Both teams had just hit level 20 and moved towards the middle temple. Blue Team arrived first, but Red Team was close behind, and sieged up in the bushes on the southeast corner of the temple. A fight was inevitable.
Once again, Blue Team engaged with Tyrael casting judgment on Valla, with Illidan following up with hunt. Goodbye, Valla. This time, however, Red Team was better positioned to counter the heavy dive. ETC nailed a nearly perfect mosh pit that caught four Blue Team members.
Unfortunately, there were two problems. First, Valla was dead, so Red Team’s damage output during the mosh pit was hobbled. Second, the only person not dancing was Blue Team’s biggest damage dealer. And Mr. Odin was not happy.
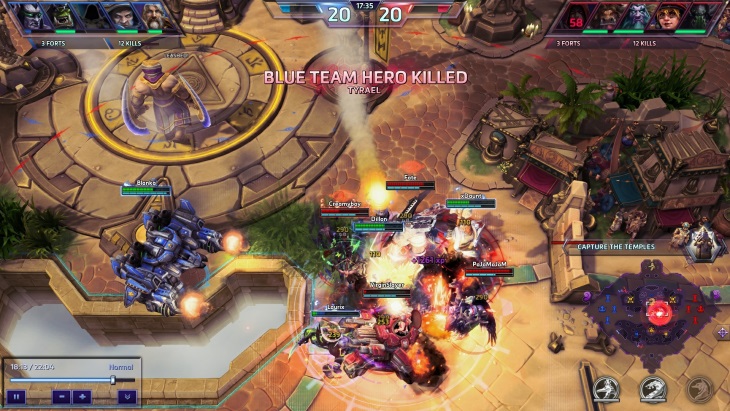
Nuclear launch detected.
The other mistake that Red Team made here was focusing on Tyrael during the mosh pit. They should have killed Illidan first.
With all of their damage dealers dead, Red Team was forced to withdraw. Blue Team again moved to aggressively leverage their position. Rehgar and Illidan seized middle temple, while Uther and Illidan moved to take the top temple. ETC and Malfurion moved to contest the top temple, with Abathur supporting with Symbiote. Recognizing the threat, Tychus rotated top to engage, resulting Blue Team killing Malfurion and forcing ETC to retreat.
Having once again establish map control, Blue Team started to seize all of the merc camps, starting with Red Team’s Bruisers. By this time, the temples had blasted Red Team’s keeps into dust. Red Team was now under siege from all directions.
This Bruiser push would inevitably force Red Team to defend.
In one last desperate attempt to save the game, Red Team moved to intercept Blue Team at the boss. Here is the critical point that must be understood: Blue Team does not need to fight to win here. Because all of Red Team’s keeps are down, its lanes are being pushed. Blue Team merely needs to wait for either a clear opening to take the boss or, simpler still, for the next temple phase to begin to secure victory.
Just take a look at what is pushing top lane.
Predictably, Red Team did back off to defend. Unfortunately, Tyrael couldn’t resist a seemingly free shot on Valla.
As of the Sylvanas patch, Valla's Vaults can no longer dodge Judgment.
Except she Vault-dodged the Judgment.
Illidan then used hunt on Valla. Unbelievably, she used Bolt of Storm to dodge Hunt as well. This time, Valla survived assassination and had escaped to the safety of the back line.

Red Team then turned around and went to work, slaughtering Uther, Illidan, and Tyrael.
The rout was on. Red Team emerged unscathed. The seventh temple phase also began, and all three temples activated.
Meanwhile, at the Red Base, Blue Team’s minions were pushing hard. The base race was on. With the temples still activating, Red Team opted to rush Blue Team’s core. Rehgar and Illidan rushed Red Team’s core.
Ultimately, Illidan finished off the Red Team’s core with just seconds to spare before Blue Team's core fell. GG.
Conclusion
Sky Temple is a map where players better have a plan. The power of the temples means that small mistakes can quickly compound into major disasters. With this guide, you should now be armed with the knowledge needed to best leverage the mechanics of this map and ride the lasers to victory.